
Last updated October 16, 2026
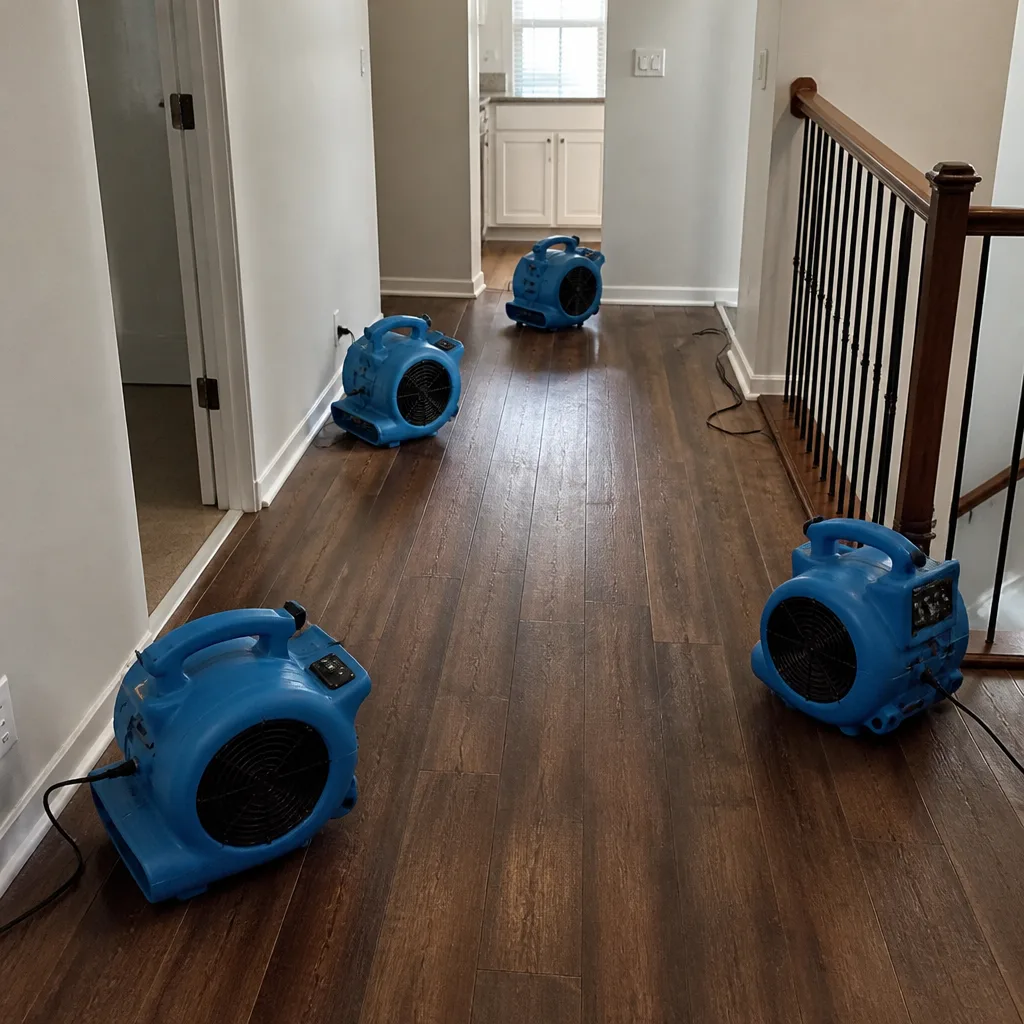 Water damage drying
 Fire & smoke cleanup
 Mold remediation
 Storm response
 Sewage cleanup
 Reconstruction
Free visual inspection and a written scope of work before any mitigation begins - photos, moisture readings, and drying logs go in your claim file
The scope we write is the scope we bill. Anything new gets shown to you, in writing, before we touch it.
Get your free estimateWater Damage Restoration Maintenance Checklist for Brooklyn Homeowners
Brooklyn’s housing stock tells a story: brownstones from the 1890s, brick rowhouses from the 1920s, and a steady mix of mid-century apartments and newer condos. Each has its own set of water vulnerabilities. But here’s something most homeowners don’t realize until it’s too late: the number-one source of water damage claims in Brooklyn isn’t a dramatic burst pipe or a flooding storm. It’s slow, unnoticed water migration, the kind that seeps through a parapet wall after a heavy rain, or backs up from a rear-yard drain clogged with sycamore leaves, and quietly rots a beam for two years before anyone smells it. This guide is built for those realities. You’ll learn the specific maintenance steps that prevent the problems we see most often in Brooklyn homes, from Gowanus to Gravesend, and how to spot trouble before it turns into a five-figure Water Damage Restoration services bill.
Quick Answer
A Brooklyn water damage prevention checklist should prioritize five things: inspecting parapet wall coping and brick pointing every spring and fall, clearing rear-yard and areaway drains monthly during leaf-drop season, checking basement relative humidity weekly from April through October, confirming washing machine hoses and water heater conditions every six months, and monitoring shared party walls for moisture staining that indicates a neighbor-side leak. Most homeowners can handle the visual checks themselves, but any reading above 60% relative humidity or any persistent staining on a party wall warrants a professional assessment.
Restoration work we handle
Table of Contents
- Parapet Walls and Coping: Brooklyn’s Most Overlooked Leak Source
- Rear Yard and Areaway Drainage: Seasonal Maintenance That Prevents Backups
- Basement Apartment and Cellar Moisture Monitoring: What to Check and When
- Shared Party Wall Moisture: How to Tell If the Problem Is Yours, Theirs, or Both
- Appliance and Supply Line Checks: Hoses, Water Heaters, and What Replacement Actually Costs
- Flat and Low-Pitch Roof Drainage: What Brooklyn’s Rooflines Demand
- The Seasonal Maintenance Checklist: A Month-by-Month Brooklyn Schedule
- Common Mistakes to Avoid
- When to Call a Professional
- Frequently Asked Questions
Parapet Walls and Coping: Brooklyn’s Most Overlooked Leak Source
If you own a brownstone or brick rowhouse in neighborhoods like Park Slope, Bed-Stuy, Cobble Hill, or Carroll Gardens, your parapet wall is the single most likely place for water to enter your home without you knowing it. A parapet is the low wall that extends above your roofline, often at the front of the house facing the street. It’s exposed to weather on both sides, which is exactly why it fails. The coping, that’s the cap of stone, terracotta, or metal that sits on top of the parapet, is your first line of defense. When coping cracks or the mortar joints between coping stones open up, water gets inside the wall. From there it travels down through the brick, behind the plaster, and into your ceiling or top-floor walls.
Here’s what we’ve learned after two decades of water damage restoration in Brooklyn: the visual signs of parapet failure are usually present a full year before interior damage becomes obvious. That’s a full year of opportunity to fix a $400 coping joint before it becomes an $8,000 wall and ceiling restoration. You don’t need a ladder to check most of this. From the sidewalk, look up at your parapet and note these warning signs:
- White staining or efflorescence on the brick below the coping. This white, chalky residue is mineral salt left behind when water evaporates from the brick. It means water is moving through the wall.
- Dark, rust-colored streaks running down from the coping stones. This often indicates corroding metal flashing beneath the coping or failing parge coating.
- Cracked, missing, or visibly shifted coping stones. From the street, a shifted stone will look out of line with its neighbors. A missing stone is even more obvious and is an emergency.
- Brick face spalling. Spalling means the brick face is flaking or popping off in chunks. It happens when water gets into the brick, freezes, expands, and blows the face off. Brooklyn winters make this worse every single year.
- Vegetation growing out of the parapet. If a weed or small tree is growing from your parapet joint, its roots are already inside the wall system. That’s a slow leak that has been active for at least a growing season.
We recommend a parapet inspection twice a year: once in late March or April after the freeze-thaw cycle, and once in October or November before winter sets in. If you spot any of the signs above, call a licensed mason who knows Brooklyn brownstones. Not a general handyman. Parapet work on a four-story rowhouse involves working from a scaffold or a rooftop, and the safety risk is real. A professional mason will also know the Landmarks Preservation Commission rules if you live in a designated historic district like Brooklyn Heights or Fort Greene, where exterior work may require a permit.
Rear Yard and Areaway Drainage: Seasonal Maintenance That Prevents Backups
Brooklyn’s tree-lined streets are part of what makes the borough beautiful, but they come with a maintenance cost that most homeowners don’t factor in. The leaves from London plane trees, Norway maples, and pin oaks, the species that dominate many Brooklyn blocks, are the primary cause of rear-yard and areaway drain clogs. An areaway is the sunken space below sidewalk level that leads to a basement door or window, common on brownstones across the borough. When the drain in that areaway clogs, water has nowhere to go except into your basement.
Here’s the pattern we see every November and December at Dryden Restoration Brooklyn home service calls: a homeowner goes away for Thanksgiving weekend, a heavy rain hits on Saturday night, the areaway drain is packed with wet leaves, and by Sunday morning there’s a foot of water against the basement door. The water finds its way inside through the door threshold, the window frame, or the foundation wall. The restoration bill starts at around $2,500 for even a modest basement water intrusion.
The fix is a maintenance habit, not a one-time repair. Follow this sequence:
- Identify every drain on your property. Most Brooklyn rowhouses have a rear yard drain near the back door, an areaway drain at the front, and possibly a roof leader that connects to a drain line at the base of the building. Walk your property and make a list.
- Clear surface debris weekly during leaf-drop season. From mid-October through mid-December, get into the habit of a five-minute sweep every Sunday. Pull leaves, twigs, and anything else off every drain grate. This one habit prevents more water damage than almost anything else in this guide.
- Flush each drain with a garden hose monthly during the growing season. From April through September, run water through each drain for 30 seconds to confirm it’s flowing. A slow drain is an early warning. A backed-up drain is a problem waiting for the next heavy rain.
- Check the drain cover and the area around it for settlement. Over time, the concrete or brick around a drain can settle, leaving a low spot where water pools instead of flowing toward the drain. If you notice water standing around a drain after a rain, the grade has failed and needs repair.
- Consider drain guards if you have heavy tree coverage. A domed strainer or a leaf basket that sits inside the drain can reduce the frequency of clogs. Expect to pay $15 to $40 per drain guard at a local hardware store.
If you have a basement apartment, this maintenance is not optional. In neighborhoods like Ditmas Park and Midwood, where many homes have garden-level or basement rental units, a backed-up areaway drain can mean a tenant emergency, a habitability complaint, and a restoration bill that includes not just drying but also mold remediation in Brooklyn if the water sat for more than 48 hours. Every hour of standing water matters.
Basement Apartment and Cellar Moisture Monitoring: What to Check and When
Brooklyn basements and cellars are not like basements in the suburbs. Many are below grade on all four sides, built of stone, brick, or concrete block, and some have been finished into apartments without the drainage systems a modern foundation would include. That means moisture management is not a set-it-and-forget-it task. It’s a weekly observation and a monthly tool reading, especially from April through October when outdoor humidity in Brooklyn regularly exceeds 70%.
The cheapest and most useful tool you can buy for this job is a digital hygrometer, which measures relative humidity, or RH. You can buy a reliable unit for $12 to $25 online or at any hardware store. Here’s the target range: you want the RH in your basement or cellar to stay between 30% and 50%. Readings between 50% and 60% mean you should be running a dehumidifier and looking for the moisture source. Readings above 60% for more than a few consecutive days should trigger a professional call, because that’s the threshold where mold growth becomes likely on organic materials like wood framing, drywall paper, and stored belongings.
Here’s a practical monitoring schedule:
- Weekly (April through October): Walk the entire basement perimeter. Look for condensation on walls, damp spots on the floor, water beading on pipes, and any musty smell. Run your hand along the bottom two feet of the walls in finished basement areas, feeling for dampness that isn’t visible through paint or paneling.
- Monthly (year-round): Check your hygrometer reading and write it down. A log that shows rising RH over three consecutive months is far more useful to a professional than a single reading. Also check under sinks, behind the washing machine, and around the water heater for any signs of slow drips.
- Seasonally (April and October): Inspect the exterior foundation wall for cracks, which can be more visible when the ground is wet. Also check that the soil grade slopes away from the house, not toward it. In many Brooklyn row houses, the rear yard has been paved or concreted over decades, and the grade can fail over time.
- After every heavy rain (year-round): Check the basement within 24 hours of any storm that drops more than an inch of rain. Brooklyn is susceptible to combined sewer overflow events during intense storms, and even homes that are normally dry can see water enter through a floor drain or a sewer backup.
One more Brooklyn-specific point: if you have a finished basement with drywall over masonry walls, know that drywall wicks moisture upward from a damp floor slab. The baseboard might look fine, but the bottom six inches of drywall behind it can be saturated. If you ever pull a baseboard for a renovation and the drywall behind it feels dusty-white and chalky, that’s mold. The right next step is a professional assessment, including an RH reading and a moisture meter check, before any rebuilding happens.
Shared Party Wall Moisture: How to Tell If the Problem Is Yours, Theirs, or Both
Most Brooklyn homes share at least one party wall with a neighbor. A party wall is the structural wall that divides two attached houses. In a brownstone row, you typically share two: one on each side. In a brick rowhouse, you might share one or two, depending on whether you’re an end unit. The challenge with party walls is that moisture travels. Water that enters your neighbor’s house through their parapet, their roof, their plumbing, or their foundation can migrate horizontally through the party wall and appear on your side. When that happens, you have a moisture problem that you cannot fix from your house alone.
Here’s how to tell whose problem it is, and how to document it before it becomes a legal dispute with your neighbor or a fight with two insurance companies:
- Identify the location of the staining precisely. Moisture on a party wall usually appears as a yellowish-brown stain on plaster or drywall, or as bubbling paint. Note exactly where it is: which wall, how far from the shared wall line, how high from the floor, and whether it grows after rain or stays constant.
- Track the stain’s behavior. If the staining grows after rain, the source is almost certainly roof or parapet related, and it could be on either side. If the staining grows when your neighbor runs their shower or washing machine, the source is likely their plumbing. If the staining stays constant regardless of weather or neighbor activity, the source could be a slow, steady plumbing leak on either side, or ground moisture wicking upward through a party wall foundation.
- Talk to your neighbor early, not later. The worst mistake we see homeowners make is waiting for the stain to get bigger before mentioning it to the neighbor. Early communication is cheaper and easier. Say something like: “I’m seeing some moisture on our shared wall, and I want to catch it early. Can I come take a quick look at the other side of that wall in your unit?”
- Document everything with photos and a moisture meter. Use a $20 pin-type moisture meter to take readings on your side of the wall. Take a reference reading on a known-dry wall in the same room, then take a reading on the stained area. If the stained area reads significantly higher, you have active moisture. Take a photo of the meter reading next to the stain. This is the documentation your insurance adjuster will want, and it’s also what a restoration professional will need to give you an accurate scope.
- Call for a professional assessment before opening the wall. If the staining cannot be explained by a visible source and the moisture meter confirms active moisture, opening the wall without knowing what’s behind it can spread mold spores through your home and make the eventual repair more expensive. A professional will use a thermal imaging camera or a borescope inspection to see what’s inside before any destructive work happens.
In our experience at mold remediation in Brooklyn jobs, party wall moisture is one of the most common origins of disputes between neighbors. It’s also one of the easiest problems to solve when it’s caught early, before the framing lumber is fully saturated and before mold has had time to establish. The earlier you document, the better your position for any insurance conversation.
Appliance and Supply Line Checks: Hoses, Water Heaters, and What Replacement Actually Costs
Not every water damage problem in Brooklyn is structural. Some of the most common and completely preventable water damage we see comes from appliances and plumbing supply lines that were simply too old. The good news is that these components are cheap to replace. The bad news is that almost nobody replaces them on a schedule. Here are the specific items to check, when to check them, and what replacement should cost in Brooklyn in 2025.
Washing machine hoses. Rubber washing machine hoses fail from the inside out. They degrade, bulge, and eventually burst, typically while the machine is running and you’re not home. The industry-standard service life for rubber hoses is three to five years. We recommend replacing them with braided stainless steel hoses, which have a service life of ten years and fail far less often. Cost: $25 to $45 for a pair of braided stainless hoses at any Brooklyn hardware store. Replacement time: 20 minutes with basic tools. Check your hoses by looking for bulges, cracks, or rust at the connection points every six months.
Water heater age and condition. A standard tank water heater in Brooklyn lasts 8 to 12 years. After that, the risk of a tank failure rises steeply. The failure mode is usually a pinhole leak in the tank itself, which dribbles water slowly for weeks before the bottom gives way and releases the full volume. That’s 40, 50, or 75 gallons of water into your basement or utility closet. If your water heater is over 10 years old, replace it proactively. Cost: $1,200 to $2,200 installed in Brooklyn, depending on tank size, fuel type, and whether you’re replacing like-for-like or converting. Look at the manufacturer’s label, which includes the manufacture date, to determine the age.
Supply line materials. Polybutylene supply lines, which were installed in some Brooklyn homes built or renovated between 1978 and 1995, have a well-documented failure rate. The pipes degrade from the inside when exposed to chlorine in municipal water, and they can fail without warning. If you see gray plastic supply lines under a sink or behind a toilet, have a licensed plumber evaluate them. Replacement cost: $150 to $400 per fixture location in Brooklyn, depending on access and the length of the run.
Refrigerator ice maker lines. The plastic or copper line that feeds your refrigerator’s ice maker is small, out of sight, and under constant pressure. If it fails, it can release a surprising amount of water in a short time. Check it annually for kinks, cracks, or corrosion at the connection points. If you’re replacing a refrigerator line, use a braided stainless connector designed for ice makers. Cost: $15 to $30.
Dishwasher supply and drain lines. Dishwashers are the most common source of slow leaks under kitchen cabinets. The leak is often small enough to be absorbed by the cabinet base before it becomes visible. Check under your dishwasher every three months. Pull off the toe-kick panel and look for water staining on the subfloor or cabinet base. If you see staining, call a plumber before the damage spreads to the floor joists.
Here’s a quarterly appliance check sequence you can do in under 30 minutes, no tools required:
- Turn off the water supply to the washing machine (if accessible) and inspect both hoses at both ends.
- Look at the water heater’s base and the area around it for any signs of rust, water staining, or standing water.
- Open the cabinet under the kitchen sink and feel the supply lines with your hand. They should be dry.
- Pull the refrigerator away from the wall (if possible) and check the ice maker line.
- Remove the dog-toe kick panel under the dishwasher and check the cabinet base for moisture.
Flat and Low-Pitch Roof Drainage: What Brooklyn’s Rooflines Demand
A significant percentage of Brooklyn’s housing stock has flat or low-pitch roofs, especially the brownstones and rowhouses that dominate neighborhoods like Crown Heights, Bed-Stuy, and Clinton Hill. A flat roof is never actually flat. If it were, water would pool and never drain. A properly installed flat roof has a subtle slope, typically a quarter inch per foot, that carries water toward a roof drain or a scupper, which is an opening in the parapet wall that lets water flow off the roof and down a leader to the ground.
The problem with flat roofs is that the water sits on the membrane longer than it would on a pitched roof. Any weakness in the membrane becomes a leak faster. And because the roof is hidden behind a parapet wall at the front and often a false parapet at the rear, a leak can go unnoticed for months. Here’s the maintenance you should be doing:
- Clear the roof drain or scupper at least twice a year. In the spring after the last freeze and in the fall after leaf drop. Leaves, roofing granules, and blown debris will clog the drain, and then water pools against the parapet and finds its way through. If you can safely access your roof, use a gloved hand or a small tool to clear the drain. If you cannot safely access the roof, which is the case for most Brooklyn homeowners, hire a licensed roofer or a handyman who works on flat roofs to do this for you. Expect to pay $150 to $300 per visit in Brooklyn.
- Check the roof membrane for visible cracks, blisters, or open seams after any major storm. If you have a roof hatch or bulkhead access, you can do a visual check from the hatch without walking the roof. Look for areas where the membrane has lifted from the substrate, which is called a blister, or where seams have opened. These are the first places water gets in.
- Inspect the flashing at every roof penetration. Vent stacks, skylights, the chimney, and the hatch are all places where the roof membrane has been cut and patched. The flashing is the metal or membrane material that seals these penetrations. Check each one for cracks, rust, or lifted edges.
- Keep gutters and leaders at the rear of the house clear if you have them. Not all Brooklyn flat roofs have gutters, but many rowhouses have a rear gutter or a roof leader that carries water from the roof down to the areaway or the rear yard drain. These need to be kept clear during leaf drop, or the water will back up and enter the house at the roof line.
Roof work is genuinely dangerous. We recommend that homeowners perform only visual inspections from safe access points, and that any actual roof work, including drain clearing if access is difficult, be done by a professional who is insured for roof work. A fall from a Brooklyn rowhouse roof is not a risk worth taking.
The Seasonal Maintenance Checklist: A Month-by-Month Brooklyn Schedule
Here’s the entire guide condensed into a seasonal rhythm. Print this, put it on your refrigerator, and set calendar reminders on your phone. The goal is to build these checks into your existing routine so they become automatic rather than something you remember only after a problem appears.
Spring (April and May):
- Inspect parapet walls and coping from the street. Look for efflorescence, rust streaks, cracked stones, and spalling brick. This is the post-freeze-thaw inspection, and it’s the most important one of the year.
- Clear your rear yard drain, areaway drain, and any roof drains or scuppers of leaves and debris.
- Flush every drain with a garden hose to confirm it flows freely.
- Check your basement hygrometer. If the RH reading is above 50%, run the dehumidifier and look for the moisture source. In April and May, many Brooklyn basements see rising RH as outdoor humidity climbs and the ground thaws.
- Inspect the washing machine hoses and the water heater. If the water heater is 10 years or older, plan for a proactive replacement before next winter.
Summer (June through August):
- Monitor basement RH weekly. Summer is the highest-risk season for basement mold in Brooklyn because the combination of warm outdoor air and cool basement surfaces creates condensation on walls and pipes.
- After any heavy thunderstorm, which are frequent in Brooklyn in July and August, check the basement within 24 hours. Look for any water around the perimeter, at the base of walls, or near floor drains.
- Check the party walls in rooms that share a wall with a neighbor. Look for any new staining, bubbling paint, or musty smell. Summer is when air conditioners run constantly, and condensation from a neighbor’s AC unit can travel through the party wall.
- Inspect the supply lines under sinks and behind the toilet. Run your hand along each supply line. Any moisture at all is a warning sign.
Fall (October and November):
- Clear drains weekly during leaf drop. This is the single highest-impact maintenance habit in this guide. Brooklyn’s street trees drop a remarkable volume of leaves, and they will clog your drains.
- Perform the second parapet inspection of the year, this time from the street and from any available roof access point. This is the pre-winter check.
- Clean out gutters and leaders if you have them.
- Check the water heater again. If you didn’t replace it in the spring and it’s now over 10 years old, December is the worst time to discover a failed tank. Take care of it before the first freeze.
- Make sure all exterior hose bibs are shut off and drained. A frozen hose bib can burst, and the leak can travel inside the wall.
Winter (December through March):
- After any significant snowfall, check the area around your rear yard drain and areaway drain. Melting snow needs a clear path to a drain. If the drain is buried in snow and ice, meltwater will find another path, which often means into the basement.
- Monitor the parapet walls through the winter, especially after freeze-thaw cycles. The repeated expansion and contraction of water in brick joints is what causes spalling and coping cracks to grow.
- Keep an eye on the basement hygrometer. Winter RH readings in Brooklyn should be at their lowest point of the year, often in the 30% to 40% range. If you see RH staying above 50% in winter, you have an active moisture source that needs investigation.
- If you have a tenant in a basement apartment, check in with them after heavy rains or freezes. They may not report moisture to you unless you ask.
Common Mistakes to Avoid
- Ignoring street-level parapet signs because you can’t see damage from inside. Many homeowners assume that if there’s no ceiling stain, there’s no leak. By the time the stain appears on the top-floor ceiling, the parapet has been leaking for months or years, and the hidden damage is far more extensive than the visible stain suggests. Look at the parapet from the street twice a year.
- Assuming the rear yard drain is fine because it worked last year. Drain systems fail slowly and then all at once. A drain that flowed fine last October can be completely packed with leaves and debris by this October. The only way to know is to check it, every week, during leaf-drop season.
- Relying on a single RH reading to assess basement moisture. A basement that reads 45% RH in the middle of a dry January week can read 65% RH during a humid July week. The useful information is the trend over time. Keep a monthly log.
- Opening a party wall yourself to “see what’s going on” before calling a professional. If the moisture is active, opening the wall spreads mold spores through your living space and makes the eventual remediation more expensive. A professional with a borescope can see what’s inside without demolition.
- Waiting to mention a party wall stain to your neighbor until it’s clearly visible from across the room. The earliest days of a party wall leak are the cheapest days to address it. By the time the stain is unmistakable, both sides of the wall are involved and the repair is more complicated.
- Replacing a water heater only after it fails. A water heater failure in the middle of winter is inconvenient in the best case and catastrophic in the worst case if the tank bursts while you’re away. Proactive replacement at the 10-year mark is cheaper than emergency replacement plus water damage restoration.
- Trying to do roof work without a professional. Every year, homeowners are injured doing roof maintenance that they could have hired out for $200. The savings is never worth the risk.
When to Call a Professional
Some water problems are DIY-appropriate. Clearing a drain, checking a hose, and monitoring a hygrometer are all things any homeowner can do. But there are specific situations where the right move is to call a professional immediately. If the basement RH reading stays above 60% for more than a week, the clock is ticking on mold growth, and a professional assessment is warranted. If you see active water entering the basement from a wall, floor, or drain, stop trying to solve it yourself and make the call. If a party wall stain is spreading, that means active moisture on a shared structural element, and the documentation and assessment need to happen before the wall gets opened. If you’ve had a washing machine, water heater, or supply line failure and water has soaked into drywall, insulation, or flooring, the drying process needs to start within 24 to 48 hours to prevent secondary damage. Dryden Restoration Brooklyn offers free estimates in Brooklyn. Call (607) 399-3439 and a live person will answer, no matter what time you call. We’ll schedule a visit, give you a written price before any work starts, and explain exactly what we’re seeing in plain English.
Frequently Asked Questions
Twice a year, in early April and again in late October or November. The spring check catches freeze-thaw damage from the winter, and the fall check catches any damage that developed over the summer. Both checks can be done from the street in under ten minutes.
A healthy Brooklyn basement should read between 30% and 50% relative humidity. Readings between 50% and 60% call for a dehumidifier and an investigation into the moisture source. Readings above 60% for more than a week should trigger a professional call, because mold growth becomes likely at that level.
Pay attention to when the stain grows. If it grows after rain, the source is roof or parapet related and could be on either side. If it grows when your neighbor runs their shower, washing machine, or dishwasher, the source is on their side. If it stays constant, it could be a slow plumbing leak on either side or ground moisture wicking upward. Use a moisture meter to document the readings, and talk to your neighbor early.
First, clear any visible debris from the drain grate if it’s safe to do so. If the water is backing up because the drain line itself is clogged or the sewer is overwhelmed, do not keep pouring water down the drain. Document the standing water with photos, remove any belongings from the area, and call a professional. In Brooklyn, combined sewer overflow events can cause drains to back up during intense storms even when the drain itself is clear. If water is entering your basement, call (607) 399-3439 immediately.
A dehumidifier is a control measure, not a solution. It can keep RH below the mold threshold, but it does nothing to stop water from entering the basement in the first place. If you’re running a dehumidifier constantly and the RH still climbs above 55%, you have an active moisture source that needs to be addressed. Find the source, fix it, and then the dehumidifier becomes a backup rather than a primary defense.
A small, contained water intrusion in a basement, the kind of job that involves drying a concrete floor and a section of drywall, typically starts around $1,500 to $3,000 in Brooklyn. A larger intrusion that involves saturated drywall, insulation, flooring, and multiple rooms can run from $5,000 to $15,000 or more, depending on the extent of the damage and whether mold remediation is also required. The single biggest variable is time: the faster the drying process begins, the lower the final cost. Call (607) 399-3439 for a free estimate, and we’ll give you a written price before any work starts.
The Bottom Line
Water damage in Brooklyn is preventable in most cases. The homes here have predictable vulnerabilities: parapet walls that leak through failed coping, rear-yard and areaway drains that clog with street tree leaves, basements that run humid, party walls that hide neighbor-side leaks, and appliances that fail on a schedule. The maintenance in this guide takes a few hours per year and costs less than $200 annually, even if you hire out the roof work and the drain clearing. The alternative is a restoration bill that starts in the low thousands and grows with every day the water sits. Catch it early, and you keep your Brooklyn home dry, safe, and standing for another century. For more guides & resources, visit our blog.
Written by Carl Brandt, Owner at Dryden Restoration Brooklyn, serving Brooklyn since 2005.
See the difference
 Before
 After
After Before
 After
After Before
 After
After